Protecting Your Transom
Securing The Boat To The
Trailer
Tire Maintenence
Trailer Tongue
Wheel Chocks
Saving Your Trailer Lights 4/6/18
Safe
Transportation of Accessories
Steering System Problems
4/7/18
Protecting Your
Transom
The transom is one of the parts of the boat which handles a great deal
of stress and force. Not only does it support the weight of the
motor, but it also withstands the application of thrust from the
motor. Generally transoms are reinforced with heavier duty
material and some sort of brace. So you will see the normal hull
backed with heavier metal or 1.5" wood.
Now when the motor is too heavy, or rather, the transom is not
supported properly during transport of the boat, extra stress is put on
the structure(s) and can lead to damage. The first picture shows
a transom brace that has been partially broken. You can see about
an inch or so tear in the metal brace near the top, this is where the
transom was flexing away due to the weight of the motor bouncing as the
trailer went down the road. The damage occured as a result of a
motor being transported a long distance without being supported.
The 130lbs or so of weight caused flex on the transom and this stress
eventually caused the aluminum to break. Metal fatigues when
flexed repeatedly and eventually tears/breaks. Aluminum isn't
exactly the strongest metal when in a thin guage.
The 2nd picture shows a backer board of a transom that did not have a
metal plate placed on between the stern clamps and wood. Keep in
mind that wood is a sponge, so during the normal condensation cycle
each day, or even if it rains or you happen to have a spell of dry
weather, the clamps can loosen up. Well if you keep tightening
these bunny ears down, you just keep compressing the board and in fact
weaken it in these areas. There should be an aluminum plate (or
stainless steel) so that the compressive forces of the stern clamps are
distributed over a wider area.
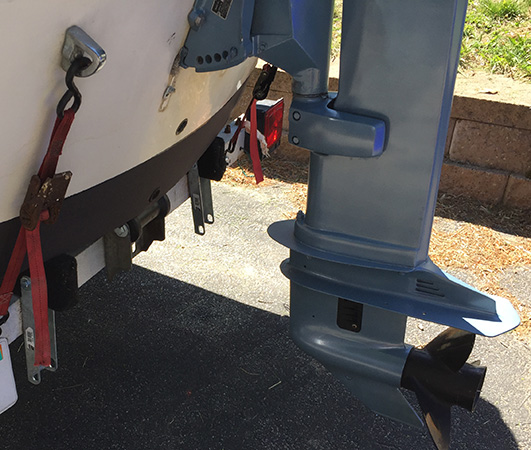
A simple way to help prevent these issues is by installing a transom
brace or "transom saver" on your trailers aft frame. What this
does is accomplish two things. It raises the motor off the ground
so that you have more clearance between the skeg and the ground, and
secondly it pretty much stops the flex of the transom as you drive down
the road. It should be noted that if you have powertrim, using
your trim unit as a support DOES NOT stop stress on the transom and you
may very well just accomplish ruining your expensive trim unit by
transporting the motor in a tilted position, supported only by the
hydraulic unit. Transom supports are available at your local
Wally-world or sporting good store, and cost about $35.00. An
inexpensive, no-brainer investment that will last for years,
compared to the cost of fixing your motor and transom of your boat.
Securing The Boat
To The Transom
One of the most common things I see when doing motor installations are
vessels which are loosely secured to the trailers that they sit
on. The obvious issue here is you don't want to lose your boat
off the trailer during transport. Yet people think that the bow
winch is enough to keep the boat where it sits, or that the bunks alone
(regardless of if they are simply wood bunks covered in fabric or
the roller type) are enough to keep the boat in place.
These are big mistakes. People rarely consider what would happen
if they had to make a sudden braking, acceleration, or aggressive
swerve due to another motorist. It doesn't take much to throw a
boat off a trailer when it's secured in a questionable manner, and even
when you take extra measures to protect your boat, that doesn't
guarantee protection against a rollover.
One thing is for sure, ignorance is not bliss, and a loose boat puts
you, your passengers, and other motorists at extreme risk for injury or
even loss of life if you don't secure your boat properly. You
also assume quite a bit more liability and risk for lawsuit should you
be found at fault for not taking the time to be informed.
At a minimum, your boat should have a good quality bow winch. The
one pictured below has expired. The winch should have a strap,
not hardware store line, and should be free of significant rust.
Check the function of the winch locking mechanism. It should have
a strong 'click spring' to insure the boat doesn't become loose.
A marginal winch could get loose as you're driving down the road and
hit a bump, jarring the locking mechanism out of place and now all that
keeps the boat in place is gravity. A sudden acceleration and the
boat falls off the back of the trailer.
The 2nd picture shows a bow safety chain as a backup measure.
This provides a 2nd layer of protection should the bow winch suddenly
let loose. Now imagine you are launching or trailering your boat
on a ramp and the winch lets go. Your boat slides off the back
of the trailer and lands on your motor skeg with the full weight of the
boat along with momentum of the boat sliding backwards. Or say
you or a friend is standing behind the boat. That person is
crushed and
possibly dies. Does it make sense to have a safety chain at
your bow?
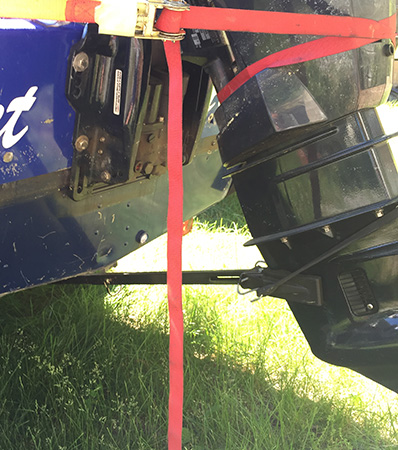
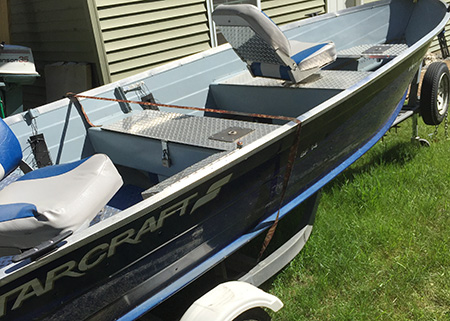
Additional straps
should be used to further secure the vessel to the trailer. A mid
hull strap, such as a simple ratchet strap, helps keep the boat
'seated' on the trailer so it's not bouncing all over the place.
It also discourages a roll-off situation if you swerve your car
suddenly to avoid, say, another car, a deer, a pedestrian.
Transom straps also discourage the boat from sliding backward (2nd
picture below).
Keep in mind that ratcheting straps should be used, and depending on
the size and weight of your vessel, pick up straps that can handle a
load. Generally the wider the strap, the more stress it can
handle. Don't sacrifice your safety or the security of your rig
over skimping on a $10 strap. Paying a little extra is far worth
the investment to say the disastrous alternative. If
your ratchet strap is getting tired/rusty/fatigued, go out and buy
replacements. You can always hit them with blaster or WD-40 to
help keep them loose and easy to operate. When they get dry or
corroded they are miserable to deal with.
Tension straps (the type that
have a 'claw' rather than a ratcheting mechanism, and rely on you
simply 'pulling hard' on it) should be avoided. These types of
straps simply don't give you the leverage to really tie things down.

Tire Maintenence
The common sense approach is to monitor your tires regularly. The
same things you do for your car tires applies for trailer tires.
What people tend to forget is that trailer tires simply don't last as
long as automobile counterparts. The reason behind this is
because they
generally are smaller in diameter. So they are turning much
higher RPMs for any given speed that a larger tire rotates. This
accelerates wear & tear.
In many instances trailer tires sit parked in the same spot for months
or years and are used rarely. Now they may not have a lot of road
miles on them, but letting rubber sit in the same spot for extended
periods leads to dry rot, and a permanent form. In the
off-season, you should jack your trailer up off the ground and support
the weight of the boat and trailer using the trailer frame, say,
resting on cement blocks. This
saves your springs and tires from having a constant load applied
to
them in one specific spot, and will greatly extend the life of your
rig. This may take
you a half hour, but is the correct way to put things away.
Check your tires regularly for the following things: tire
pressure (check the rating on the tire itself), tread, shape (round not
oval from sitting), and dry rot. The picture below shows an
expired tire with dry rot. If you've ever had a tire blow out on
you during a trip or suddenly deflate, you know risking a fun trip over
replacing a potentially questionable tire makes no sense. If you
haven't
experienced this yet,
don't push your
luck. Use the analogy many
people use when considering whether to save or throw out an old
vegetable: "When it doubt, throw it out."
While not directly related to tires, maintaining your axle and bearings
is a must as well. Spend $30.00 and buy a pair of bearing buddies
(pictured). What these do is attach in place of the normal axle
hub caps. They are spring loaded and have a grease fitting for
your grease gun. So you fill them, and the springs
force the grease into the bearings as the grease slowly burns off
during normal use. They are much less messy than hand-packing
your hubs too.
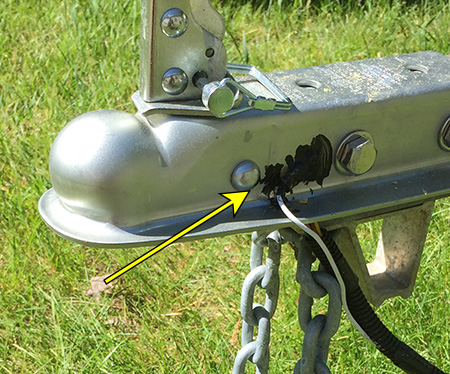
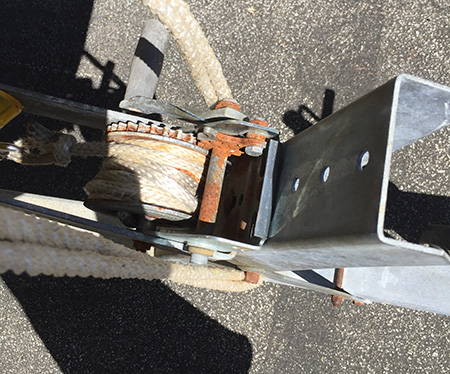
Trailer Tongues
Many times, I work on rigs that have been sitting for a long time in
someone's back yard. The boat is usually not the issue, it's
generally the motor that is being replaced but the trailer may
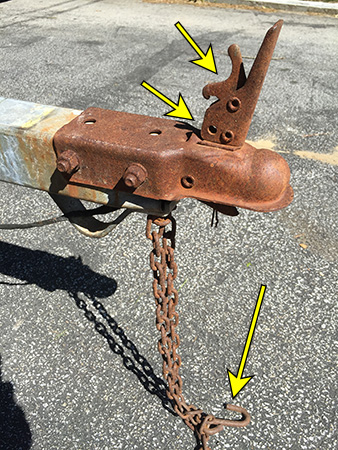
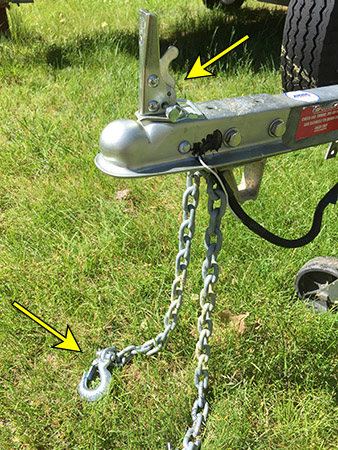
still have a lot of the original components. The tongue of
the trailer HAS to be in very good shape. If it is at all
'marginal' or in question, it should be replaced. The pictures
below show the difference between an old, expired tongue and a new
one. You can see the corrosion throughout the older tongue, with
badly corroded hitch chains and open hooks. Color doesn't mean
much, it's how pervasive the and how long it's been exposed to elements.
What you don't see in the picture is the original tongue lock
pin. This was a rusted old clevis pin that if bent slightly would
have snapped in half. Keep in mind for safety, the tongue has a
locking mechanism with a pin that should prevent the lock from ever
opening, allowing a trailer to jump off of the towing hitch. Now
if this were to happen, the two chains leading from the trailer and
attaching to your towing package is the last backup to keep the trailer
from being completely lost from the back of a vehicle.
I have seen trailers that have a single rope tied to the rear of a
customer's car, or even no backup chains at all. The picture on
the left is a low-quality, dated system with open hooks. Well
all it takes is just the right type of bump or bounce and these
chains can fall off. Or if you have a tongue lock which is very
rigid, corroded, or simply expired and not functioning at all, you are
depending on
GRAVITY to hold
your trailer from falling off of your ball
hitch. Not the type of gamble you want to fool with!
The picture on the right shows the new tongue with locking safety
hooks, and a large, new clevis pin. A trailer tongue costs only
about $25.00 and can be replaced by removing the lag bolts which hold
it in place. Loosing your rig, you might as well multiply that
simple replacement cost x100 (literally) if the plaintiff is mildly
motivated.
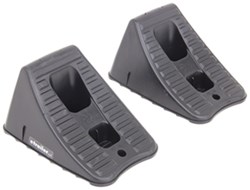
Wheel Chocks
A must have in general. These prevent the trailer from rolling
away. So if you go on a trip and need to leave your trailer
behind, you can park it in a spot at your hotel and keep it from
rolling away accidentally. They are pretty inexpensive, usually
not more than $15 for a pair. On the note of traveling, buy a
trailer hitch safety lock from your local hardware store. This
significantly discourages theft.
Saving Your
Trailer Lights
If you've ever been ready to go on a trip only to realize that your
trailer lights are malfunctioning, you know it's a real headache
figuring out what's wrong with the wiring. Well the
lighting circuit isn't all that complicated (generally a green/brown
and yellow/brown combo). However tracing the root of the problem
can be an exercise in frustration if you have a converter box on your
vehicle, or simply don't know your way around a multimeter. What
makes it even more fun is having to walk back and forth between your
drivers seat and the back of the trailer to see which functions are
working and which aren't. Wedging a 2 x 4 onto your brake pedal
is what most folks do during this process.
Generally, the root of most issues is going to be corrosion between
connections, bad grounds, or a blown lamp. Now the first two
issues
you can never really fully stop or prevent, but you can discourage
corrosion between connections by making better connections than what
your trailer light kit probably set you up with. First off, don't
use wire nuts or quick connectors that usually come with most
kits.
What you should use is heat shrink type wire splice connectors.
You
splice two wires together, crimp the connector, than use a simple heat
source (you can even use a lighter if that's all you have) to shrink
the connector, effectively sealing off the spliced wires from moisture.
When you go to back your trailer into water during a launch or out
while trailering, disconnect your wiring harness. You should do
this when you turn off your vehicle to load up gear, prior to backing
into the water. This gives your trailer lamps a few minutes to
cool off. What happens when you take a hot glass and dunk it in
cold water? It shatters. Same thing happens with your
trailer lights. Even if your light kit says "submersible," those
bulbs will still explode if they're on and hot when you back them under
water. The important aspect of this advice is to disconnect when
launching. Leave it unplugged after launching, dropping off the
vehicle/trailer, and it will still be cold when you go to
trailer. By the time you have unloaded your gear and prepped your
rig (after a day, or few days, of being on the water), the lights and
wiring should be dry enough to be plugged back in for the journey home.
If you launch/trailer in salt water, just plan to replace your
bulbs/wires with no rhyme or reason. Best practices help decrease
this hassle, but salt crytals are interesting chemical reactions, to
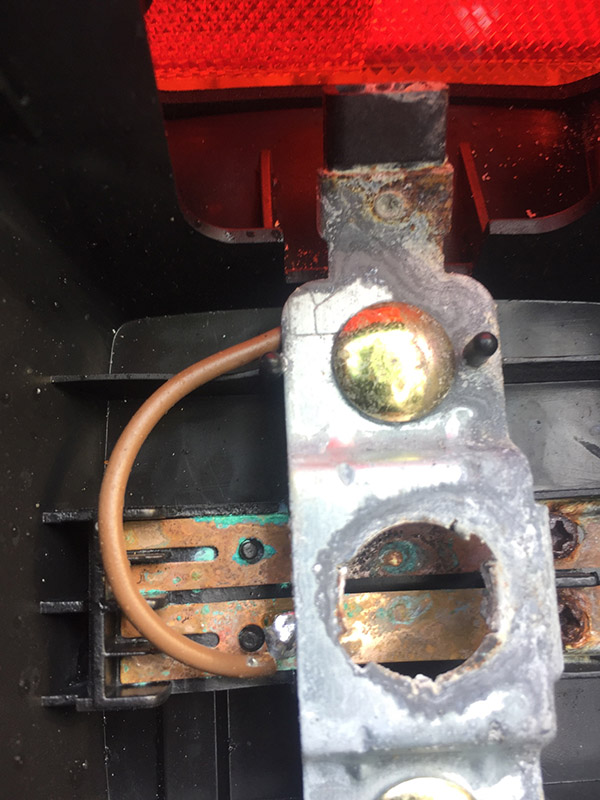
say the least. Below is a picture of a trailer lamp terminal
corroded from salt. This actually only takes a single exposure to salt
water to start. Usually after 3 times submersed (even with the
'submersible kits'), the lamp may stop working due to salt corrosion.
Your ground lead off the wiring harness (usually connected at the
tongue) should be attached to the trailer frame and prior to attaching
it, thoroughly clean that part of the trailer frame with a heavy grit
sand paper until you see shiny metal. Once attached, use a black
neoprene dip or liquid tape to seal it off from exposure to the
elements. This will again discourage corrosion from screwing up
the ground circuit of your light system.
Remember
that your trailer hitch is actually the ground to the negative side of
your trailer light system. SO, if you see your trailer lights
flickering on and off with no boat on the trailer, it's probably
because your trailer is aft-heavy, and the hitch isn't completely
seated on the ball. NO GROUND = NO CURRENT FLOW = erratic trailer
light behavior.
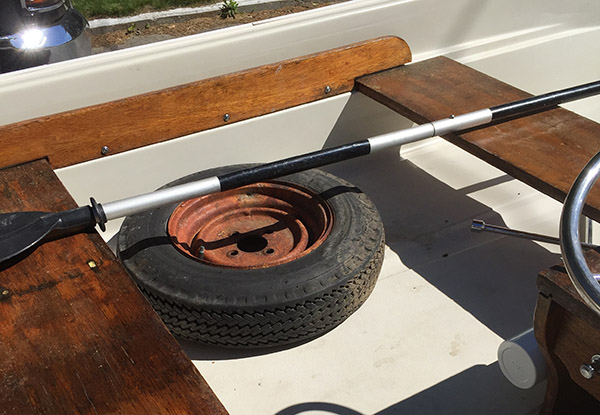
Safe Transportation of
Accessories
How many times have you been driving down the highway to your local
waterway and saw one of those bright orange life jackets on the
shoulder? The highway department must have an entire storage unit
full of these. Even though a life jacket may seem harmless to fly
out of the boat, consider what else could come out of your boat if you
break heavily or swirve suddenly.
Batteries, anchors, tackle boxes, coolers, gas cans, spare tires, oars;
these all become grenades if you launch them. There is a reason
why there are safety belts in your car. You slam on the brakes or
hit something, you keep moving even though the car stops! The
same goes for everything else that ISN'T strapped down. Make sure
you place loose objects in a trunk or storage box, or insure they are
securely strapped down. DON'T put gas cans in your trunk for
obvious reasons. The battery pictures below is not secured
adequately, utilizing a strap that is knotted. Obviously the
spare tire and paddle are not going to stay inside the boat if any
aggressive evasive maneuver is made with the towing vehicle.
Steering System
Problems
Many times I do outboard installations, the owner wants me to update
their steering system from the older style pulley and wire rope style.
This is to the modern day style Seastar, single cable system that has a
worm gear which locks the boat into a single direction for hands free
steering at low speeds. The older style with pulleys even when new and
calibrated does not allow for this. Most boats will pull to the right
due to the natural spinning of the propeller when you let go of the
steering wheel at much above 1/2 throttle.
It
should be noted that the original style of steering with pulleys and
ropes was used for nearly half a century, but are long but obsolete,
with a discontinuation of this style since the late 1960's. So when
someone buys a classic fiberglass or aluminum boat that has the
original rigging, we are talking about 50+ year old components that are
long overdue to be replaced! Old motors can be updated to newer style
steering with a knowledgeable mechanic, and for relatively low cost in
most cases (usually <$450.00). Your life is worth $450.00!
When
the older style steering fails, the rope can break, but more commonly
it slips off the steering wheel hub or jambs on one of the pulleys
because of slop/slack in the line from stretched cables, springs, or
just general wear and tear. With something that is 50 years old this
happens more often than you might think. When you are moving along at
WOT and lose steering control of the boat it takes very little to be
thrown from the craft. In many instances the boat will start doing a
'circle of death' where it goes hard left or right, and you get run
over and chopped up by the prop. This happens about a dozen times a
year in New Hampshire (home state). There is nothing eerier than seeing
an unmanned boat circling around, with marine patrol waiting to see
when the engine will run out of fuel.
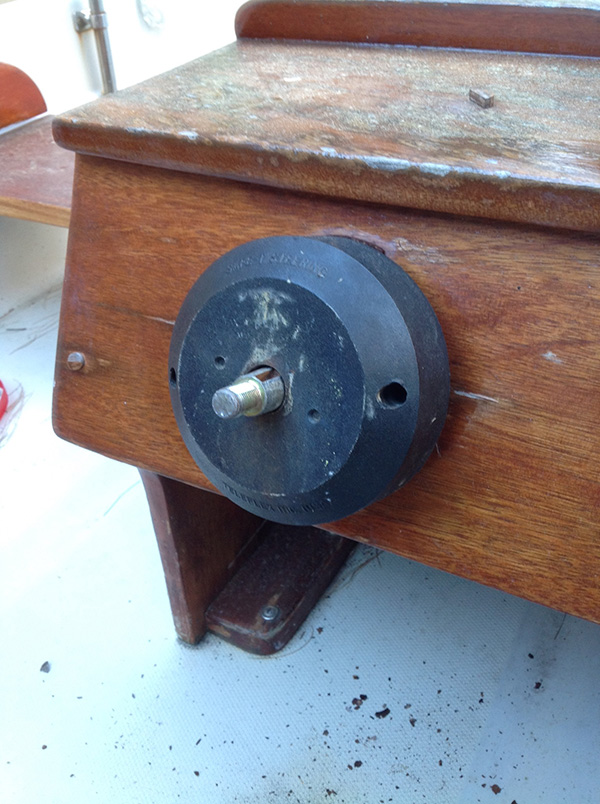
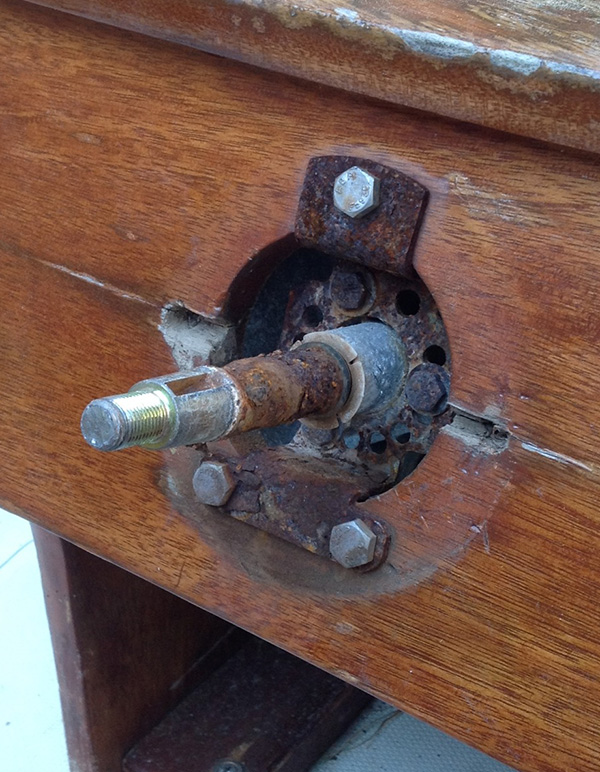
Below is a picture of a
boat brought in by a customer where his modern day seastar steering had
seized. Inspection of the cable did not reveal anything. Now these
units can get stuck if no maintained/greased down a couple of times a
season. The cable at the motor end will get stuck in the stern bracket.
You usually know this is starting to happen ahead of time because the
steering wheel will get stiff. In this instance, the hub itself was so
badly corroded that it seized up. With the bezel hiding the hub, you
would not have known this was the problem.
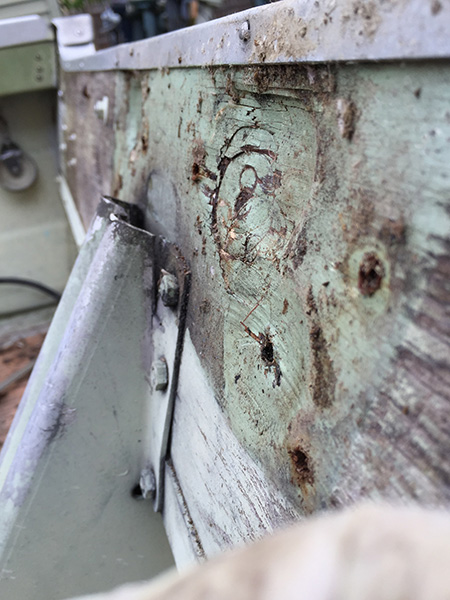
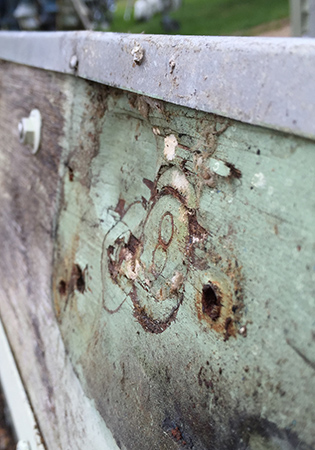
The boat was sitting on a mooring in a salt bay for all the warm months
of the year, and the owner knew very little about boats in general.
These fellas showed up to the shop with a small whaler they had
inherited, and it was sitting on a trailer with a broken axle with two
badly balded tires, which
they had driven 60 miles to deliver the boat on! Needless to say,
some
people should not be using boats, and should consider moving to Arizona
or some other desert climate where there are no boats.